| Note: This tutorial assumes that you have completed the navigation tutorials. |
| |
Simulating a Roomba on Stage
Description: This tutorial will guide you through the process of simulating a single Roomba equipped with a laser range finder on Stage, and how to use the navigation stack with it.Tutorial Level: BEGINNER
Running a simulated robot is very easy. This is very handy when you're trying a new algorithm. Sure, the simulated world is not a perfect imitation of the real world, but it gets the job done. When trying new things simulations will spare you from chasing after the robot, having to deal with dead batteries, and so on. To sum up in most cases it will speed up the process of getting that new algorithm ready!
Starting Stage
Stage will provide you a simulation of a robot, its sensors and the environment. This means that in this example ROS will give you the same topics a Roomba driver and a Hokuyo driver nodes would. After that all you have to do is run the navigation stack, similar to what you would do with a real Roomba.
To start Stage open a new terminal window and go into the roomba_stage directory:
roscd roomba_stage
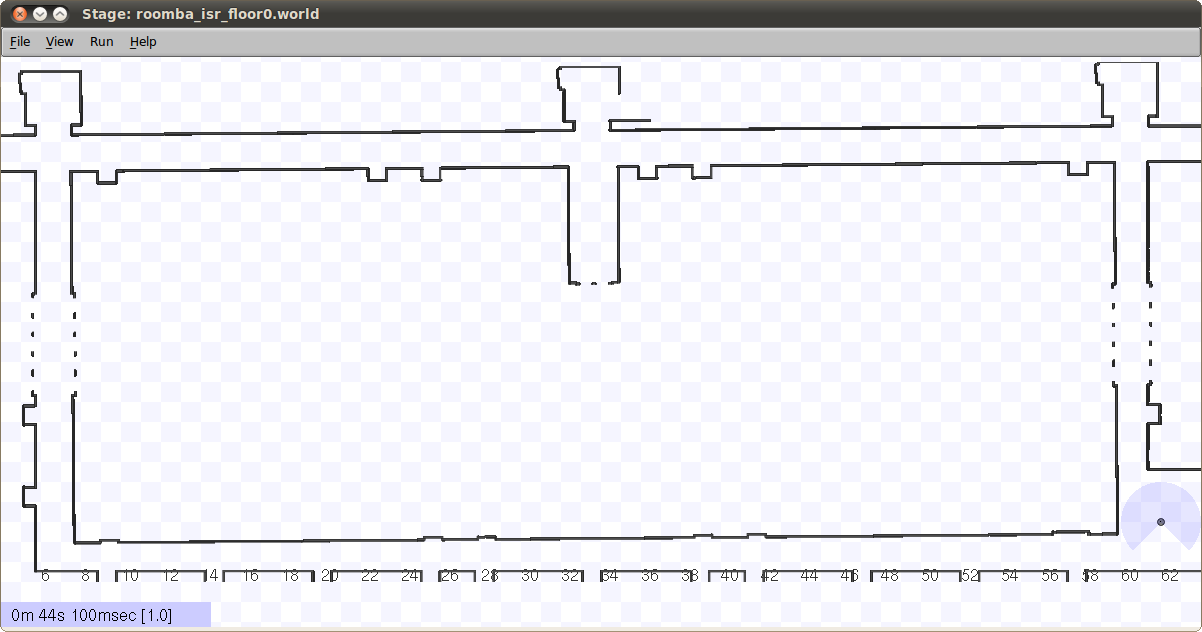
Now start Stage, using a map of floor 0 of the ISR:
rosrun stage stageros roomba_isr_floor0.world
You show see Stage come to life. 
Notice that you need to provide a .world file for Stage to know exactly what you want to simulate. Let's take a look into roomba_isr_floor0.world:
define hokuyo laser
(
        range_min 0.0
        range_max 2.0
        fov 270.25
        samples 1081

        color "black"
        size [ 0.05 0.05 0.1 ]
)

define roomba position
(
        size [0.33 0.33 0.1]

        # This block approximates the circular shape of a Roomba
        block
        (
           points 16
           point[0]  [ 0.225 0.000 ]
           point[1]  [ 0.208 0.086 ]
           point[2]  [ 0.159 0.159 ]
           point[3]  [ 0.086 0.208 ]
           point[4]  [ 0.000 0.225 ]
           point[5]  [ -0.086 0.208 ]
           point[6]  [ -0.159 0.159 ]
           point[7]  [ -0.208 0.086 ]
           point[8]  [ -0.225 0.000 ]
           point[9]  [ -0.208 -0.086 ]
           point[10] [ -0.159 -0.159 ]
           point[11] [ -0.086 -0.208 ]
           point[12] [ -0.000 -0.225 ]
           point[13] [ 0.086 -0.208 ]
           point[14] [ 0.159 -0.159 ]
           point[15] [ 0.208 -0.086 ]

           color "gray50"
        )

        hokuyo( pose [0 0 0.1 0] )
        color "gray50"
)

define floorplan model
(
        # Sombre, sensible, artistic
        color "gray30"
        # Most maps will need a bounding box
        boundary 1

        gui_nose 0
        gui_grid 0
        gui_move 0
        gui_outline 0
        gripper_return 0
        fiducial_return 0
        laser_return 1
)

# Set the resolution of the underlying raytrace model in meters
resolution 0.02
# Simulation timestep in milliseconds
interval_sim 100

# Configure the GUI window
window
(
        size [ 1200.000 600.000 ]       # in pixels
        scale 20                        # pixels per meter
        center [ 34.0  12.0 ]
        rotate [ 0  0 ]

        show_data 1                     # 1=on 0=off
)

# Load an environment bitmap
floorplan
(
  name "lab_maze"
  size [76.20 26.10 1.00]
  pose [38.10 13.05 0 0]
  bitmap "/lse_ressources/isr_maps/maps/isr_floor0.pgm"
)

roomba
(
        # Can refer to the robot by this name
        name "roomba0"
        pose [ 34.00 7.50 0 90.0 ]

        drive "diff"

        # Report error-free position in world coordinates
        localization "gps"
        localization_origin [ 0 0 0 0 ]
)
Running the navigation stack
Running the navigation stack on a simulated robot is almost the same as running it on a real robot. The only difference is that Stage will provide a laser topic called /base_scan and the frame id for the laser is now /base_laser_link, so your navigation parameters should reflect this.
To start the navigation stack open a new terminal window and run the following command:
roslaunch roomba_stage move_base_isr_floor0.launch
All the files related to the navigation stack in this example are almost the same of the ones you can find in "Running the navigation stack on the Roomba".
Making the Roomba move
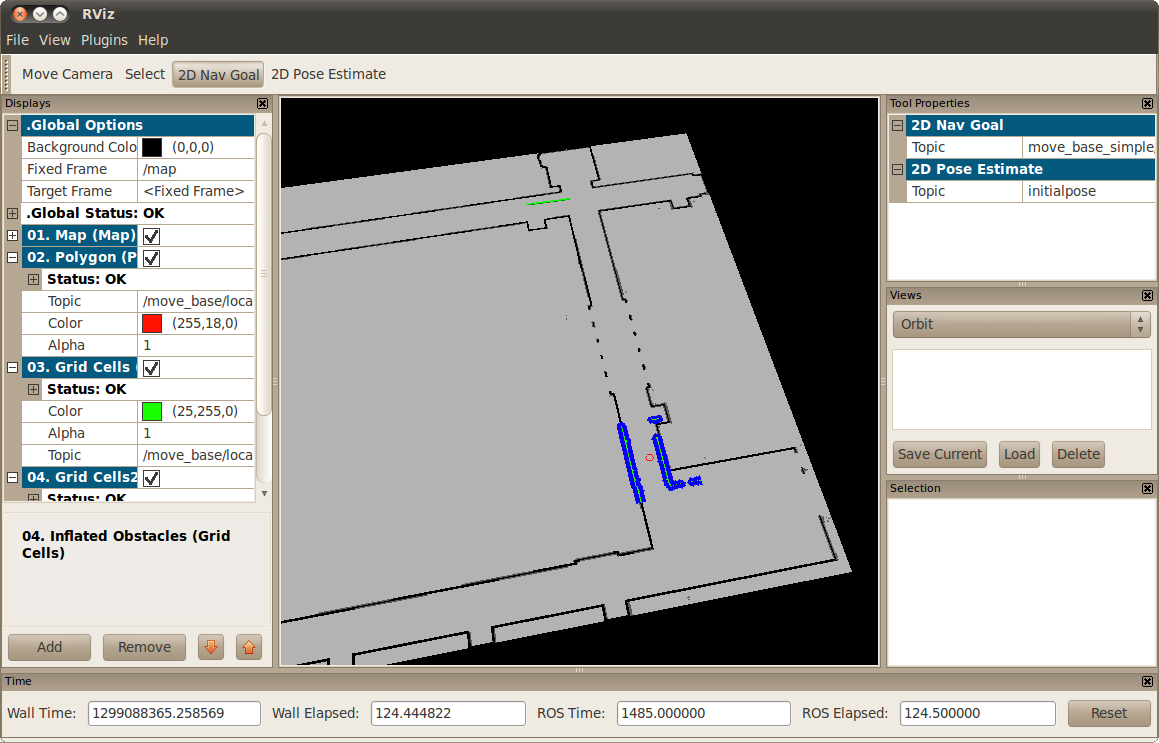
Now that all the necessary nodes are running you should be able to make the Roomba move using rviz:
rosrun rviz rviz
You can load the following .cvg file, lse_roomba_toolbox -> roomba_stage -> roomba_stage.vcg.
You should be able to see something like this... 
Now you can send the Roomba to anywhere you want using the "2D Nav Goal" button! Congratulations! You can now simulate a Roomba on Stage and control it using the navigation stack!
Credits
Thanks to Eitan Marder-Eppstein for providing the navigation parameters for the Roomba.


